

A buyer spends a few seconds on a listing before deciding to keep going or scroll past. In those seconds, they're looking for something your photos don't show: how the rooms connect. The floor plan answers that question. In NAR's 2025 Profile of Home Buyers and Sellers, 57% of buyers rated floor plans very useful when searching online.
Real estate floor plans used to be a luxury: a vendor to book, a quote to approve, a week to wait. Not anymore. A recent iPhone, five minutes on site, and the floor plan comes out with the photos, in your brand colors.
What you'll learn in this guide:
- Why the floor plan weighs as much as the photos when buyers decide to reach out
- The six things a listing floor plan should show, and what clutters it
- What the three ways to make a floor plan really cost today
- How to scan a home and publish its floor plan in the same visit
- Where the promise stops: approximate room sizes, square footage and your liability as the agent
Why the floor plan is now a listing asset in its own right
A listing works like a storefront: the photos draw buyers in, the price qualifies them, the floor plan reassures them. It's the only piece of the listing that answers the structural questions buyers ask. Does the bedroom face the street? Is the kitchen open? Do you have to walk through the living room to reach the bathroom?
The UK's largest property portal surveyed its users on this: more than a third of buyers said they were less likely to contact the agent about a home without a floor plan, one in five would ignore the listing, and one in ten wouldn't book a viewing until they'd seen one (Rightmove). That survey dates from 2013 and covers the UK, where floor plans have long been standard. US buyers point the same way, as NAR's 57% shows.
The logic holds without any statistic. A buyer who can't figure out a layout won't spend a showing on it. They'll pick the home they understand. A floor plan doesn't sell the home on its own. It keeps the listing from being ruled out.
The floor plan also filters out wasted showings
The most underrated effect of a floor plan happens before the showing. A buyer who has seen the layout already knows the bedroom runs front to back or the kitchen is closed off. The curious drop out on their own, and the people who book are the ones the home actually fits.
For you, that means fewer weekend showings that go nowhere. On an exclusive listing where you committed to a marketing plan, that saved time is concrete, and it's an easy story to tell the seller.
The floor plan is what buyers save
Buyers browse photos, but they keep the floor plan. It's what they screenshot, text to their partner, and print to compare three homes on the kitchen table. A listing whose floor plan gets passed around stays on the shortlist, and your name rides along on the info block.
The six things a good listing floor plan shows
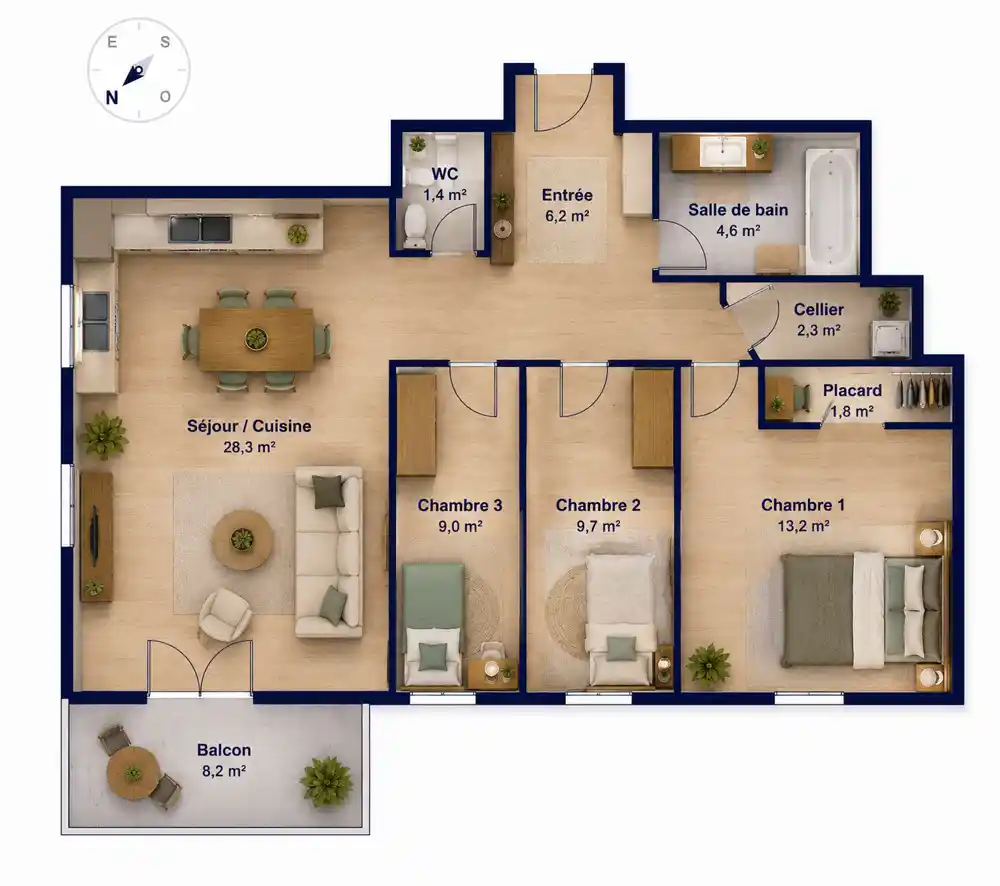
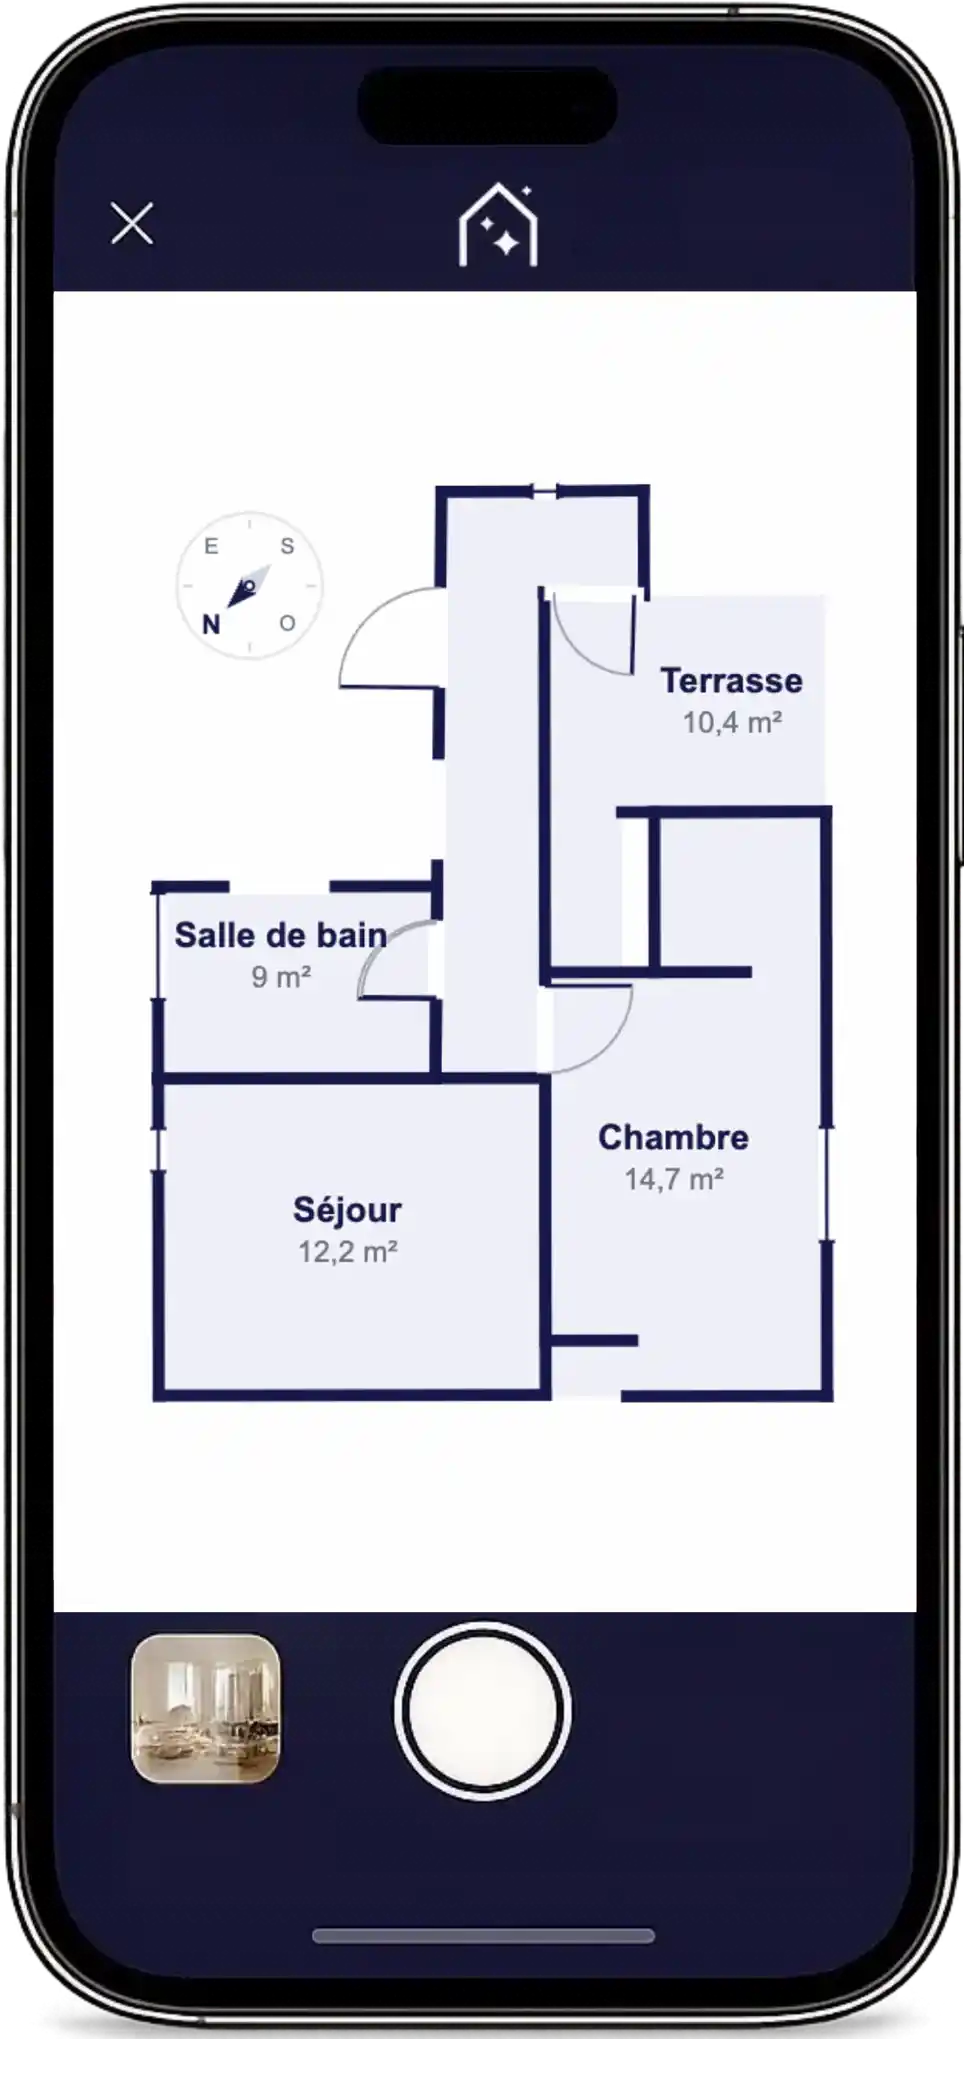 A floor plan buyers can read: labeled rooms, room sizes, visible openings and a north arrow for orientation
A listing floor plan isn't an architect's drawing. It has a different job and carries far less information. Its only mission: make the layout obvious on a six-inch screen.
Here's what it needs, and nothing more:
- The name of each room: living room, bedroom, bathroom, deck. Without labels, the plan is an abstract drawing.
- The size of each room. After the price, it's the number buyers study most.
- The openings: doors with their swing, windows and sliding doors. They show how people move through the home and where the light comes from.
- Orientation, with a north arrow. A south-facing living room isn't worth the same as a north-facing one, and buyers know it.
- The fixed features that give scale: stairs, fireplace, kitchen counters, shower. They're what make the proportions readable.
- An info block with the listing reference, total size and your contact details. That's what turns a floor plan into a branded piece.
Mistakes that make a floor plan unreadable
Clutter is the most common problem. A plan covered in precise dimensions, wall thicknesses and detailed furniture looks impressive in a meeting and helps no one on a phone. Three other traps come up often:
- No room sizes: buyers can't compare, so they move on.
- No orientation: without north, there's no way to think about light.
- An old floor plan from a previous sale, scanned crooked, with another brokerage's logo in the corner. It backfires immediately.
Three ways to make real estate floor plans
| Method | Your time | Turnaround | Typical cost | Control |
|---|---|---|---|---|
| On-site vendor (real estate photographer or drafter) | None (but an appointment to schedule) | 24 hours to 1 week | Around $250 to $350 per listing | None: every change goes back through the vendor |
| Drawing software on a computer | 1 to 3 hours per listing, after measuring by hand | Immediate | Free to a few hundred dollars a year | Full, but slow and only as good as your measurements |
| Scan from a recent iPhone | 5 minutes on site, adjustments included | Immediate | Optional add-on to a subscription | Full, the floor plan can be edited anytime |
Each one has its place. A vendor still makes sense for a luxury home, a whole building, or a project that needs technical drawings. Drawing software works if you make few floor plans and enjoy drawing them. The phone scan wins as soon as volume goes up: it's the only option where the floor plan takes no extra visit and no per-listing budget.
How to get a floor plan for real estate without a second visit
The real cost of a floor plan isn't its price. It's the second visit. A vendor means finding a slot that works for the seller, you and them, which often costs a week before the listing goes live, right when it would be freshest and most visible.
Making the floor plan during the appointment where you already take the photos removes that dependency. The listing goes live complete on day one: photos, floor plan, description. That's the difference between a listing that launches strong and one that gets filled in later, after the first wave of buyer attention has passed.
How much does a real estate floor plan cost in 2026?
Benchmarks for a standard single-family home:
- 2D floor plan from a real estate photographer: $250 in black and white for a home up to 2,500 sq ft, $299 to $350 between 2,500 and 5,000 sq ft, depending on color or black and white (The Close).
- On-site visit by a vendor: billed per listing, usually by square footage, so larger homes cost more.
- 3D tours: billed on top, also by square footage, from $250 up to 2,000 sq ft to $500 above 8,000 sq ft (same source).
At $250 a floor plan, twenty listings a year comes to $5,000 out of your marketing budget. That's why floor plans often end up reserved for high-end listings. Building them into your subscription changes the math: the cost of one more floor plan drops to zero, so “does this listing deserve a floor plan?” stops being a question. You make one for every listing. Our pricing shows the matching option.
Scan a home and publish its floor plan in the same visit

How the 2D floor plan feature works: the LiDAR depth sensor on an iPhone Pro captures the walls as you walk through the home, room by room. The floor plan builds as you go, with room sizes, and you fine-tune it on screen afterward.
Step 1: Scan room by room
In the IACrea real estate photo app, start a scan and walk slowly around the room, sweeping the walls. Plan on about five minutes for a full condo, the time it takes to walk through every room. Name each room while you scan: five seconds on site, one less fix later.
Step 2: Adjust the floor plan in the editor
No scan is perfect: a closet door left shut, a shared wall the sensor missed, a missing door. The web editor opens the floor plan flat. You can move a wall, add an opening, place stairs or a fixed feature, or correct a room size by hand. Double-click to draw a wall, scroll to zoom, and the dimensions update as you go.
Step 3: Brand it
Rotate the north arrow to match true north, turn on the info block that sums up the listing, and add your logo. Those three details are the difference between a technical sketch and a marketing piece the seller will show their friends and family.
Step 4: Publish with the photos
The floor plan sits right alongside the listing photos, so it goes up to the MLS and the portals in the same batch, with no separate file to track down. On top of that, AI furnishing for the floor plan helps buyers picture how the rooms can be used: the flat equivalent of what virtual staging does to a photo. A practical tip from the field: the AI furnishing needs the room labels to know what goes where, which is why naming rooms in Step 1 matters.
To go beyond the listing, you can also share the floor plan with buyers as a 3D floor plan: a link or a QR code opens the home in 2D, in 3D and in walk-through mode, and they can try their own furniture layout without touching yours.
Square footage, measurements and liability: where the promise stops
This is the one point where you can't afford to be approximate. A scanned floor plan shows approximate room sizes. They're useful for picturing the home, comparing rooms and drafting a description. They're not a measurement.
The square footage that carries weight is the one measured to a recognized standard. Since April 1, 2022, Fannie Mae has required appraisers to use ANSI Z765-2021 to measure and report a home's gross living area, with above-grade and below-grade areas reported separately (North Carolina Real Estate Commission). Agents aren't held to that standard everywhere, but the figure in your listing still matters. In North Carolina, the Real Estate Commission treats heated living area as a material fact: the broker has to measure it or have a qualified professional do it, and if it can't be verified, it should stay out of the advertising (same source). Rules vary by state, so check your state commission's guidance.
Don't mix up your sources either. Tax records, a previous MLS listing or the builder's blueprints often show a different number than a fresh measurement, and the North Carolina commission says brokers can't rely on any of them.
So the rule is simple. The floor plan shows its approximate room sizes, with a note that says so; the official figure is the one from the measurement. Far from weakening the floor plan, that clarity makes it more credible. It shows the seller you know exactly what each document in the file commits you to, in line with the NAR Code of Ethics duty to present a true picture in your advertising (Article 12).
Add the floor plan to the listing and your seller materials
On the MLS and the portals, photo order matters. What works: a hero shot first, then the main living spaces, and the floor plan placed after the first three or four photos. That's early enough for buyers who don't scroll the whole gallery to see it, and late enough not to replace the photos that trigger the click.
The floor plan also works outside the listing, and that's often where it pays off most:
- At the listing appointment, showing the floor plan of a home you already listed proves your method better than any pitch. The seller sees exactly what they'll get.
- In the seller updates you send after signing the listing agreement, where it documents the work you're putting in.
- On social media, alongside your photos: a floor plan stops the scroll because it gives information, where one more photo doesn't.
- On the open house feature sheet, where it lets visitors compare homes at a glance after they leave.
These are the same principles behind a real estate listing that converts: every piece of the listing should answer a question buyers actually ask, in the order they ask it. And as with professional real estate photos, consistency beats perfection: a solid floor plan on every listing beats a perfect one on a single listing.
Use the floor plan to win the listing
Sellers who interview agents compare what each one brings. On pricing and commission, the differences are small and up for negotiation. On marketing, the differences are visible.
Saying “your home will be marketed with professional photos, a video and a floor plan of every level” turns a vague promise into a deliverable the seller can picture. It's the same idea as in our real estate prospecting guide: what you show, you sell, and that includes your own work.
FAQ
Is a floor plan required in a real estate listing? In general, no. A floor plan is a marketing choice, not a legal requirement, though your MLS may have its own rules on listing media, so check them. What you do have to get right is the square footage you advertise: some states, such as North Carolina, treat it as a material fact the agent must verify. The floor plan itself isn't required, but it changes how buyers respond to the listing.
Does a scanned floor plan replace a professional square footage measurement? No, and you should never present it that way. A scanned floor plan gives approximate room sizes, useful for helping buyers picture the home and for preparing a measurement. The square footage you advertise should come from a measurement you can stand behind: appraisers on Fannie Mae loans have measured to the ANSI Z765-2021 standard since April 1, 2022, and some states require the agent to verify the figure before advertising it.
How long does it take to make a 2D floor plan of a condo? Plan on about 5 minutes for a full condo, adjustments included, and the floor plan is ready right after the scan. That time fits inside the listing appointment or the photo shoot, with no second visit and no vendor to schedule.
What should a listing floor plan show? The name and size of each room, the openings (doors and windows), a north arrow for orientation, and a branded info block with the listing reference and your contact details. Everything else (detailed dimensions, wall thicknesses, cluttered furniture) makes the plan harder to read without helping buyers picture the home.
Should I use a 2D or a 3D floor plan for a listing? The 2D floor plan is still the standard for understanding a layout: buyers read it at a glance on a phone, it needs no explanation, and it prints cleanly. A 3D floor plan looks better on an unusual home or a new build, but it costs more and doesn't replace the clear read of the layout that a flat plan gives.
Can I add a floor plan to a listing that's already live? Yes, and it's one of the fastest fixes for a listing that's sitting. Adding the floor plan and reordering the photos at the same time gives buyers who passed on the home a reason to look again, without touching the price or the listing description.
Conclusion
Nobody ever questioned whether real estate floor plans were useful. They were just too slow and too expensive to do every time. That barrier is gone. Five minutes during the visit you were already making, a quick adjustment on screen, and the floor plan goes out with the photos, in your brand colors.
The only decision left: stop saving floor plans for your high-end listings. They make the biggest difference on ordinary homes, the ones whose layout takes some effort to understand.
Want to see what it looks like on your own listings? Scan your next listing with the IACrea app and compare the result with our before/after examples: the floor plan and the photos, made in the same visit.
About the author

Co-founder & CEO of IACrea
Pauline Clavelloux is co-founder and CEO of IACrea. In daily contact with real estate agencies and agents, she understands their challenges around visibility, marketing and lead generation. On the blog, she shares actionable strategies on real estate marketing, social media and prospecting in the age of AI.
Related articles


Ready to turn your photos into content that sells?
Join thousands of real estate agents using IACrea to create professional content in seconds.
Try for free →